
클라우드 웨이즈 마이그레이션 하기 영문버전
- 2021. 8. 10. 15:36
How to Use Cloudways WordPress Migrator Plugin
P
Written by Product Support
Updated this week
Migrating your WordPress website from your current hosting provider to Cloudways is super easy with the WordPress Migration Plugin that we supply to our customers. In this tutorial, you will learn how to migrate your WordPress website to Cloudways using the Free WordPress Migrator Plugin. You can also migrate your WooCommerce applications to Cloudways using the same plugin. So, let’s get started.
How to Use Cloudways WordPress Migrator Plugin
Prerequisites
Here are a few prerequisites before migrating your application to Cloudways:
- You should have a Cloudways account.
- Admin access to your current WordPress website.
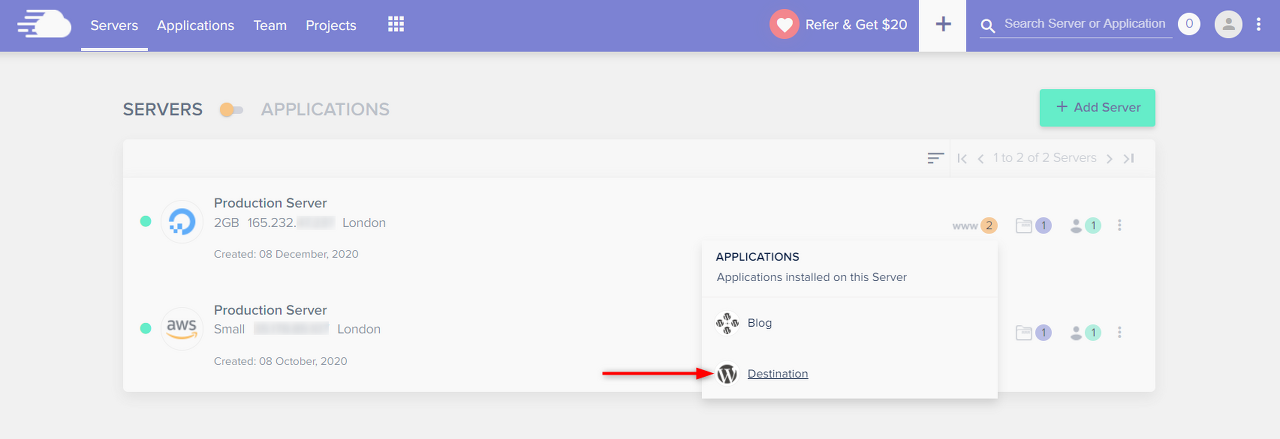
WordPress Migration — Launch an Application on Cloudways
You need a WordPress Application to be launched on the Cloudways Platform. This application will serve as a destination to test your migrated website.
You can launch a new WordPress application on a new server or on an existing server. For this example, we have launched a WordPress Application on an existing server and have named it ‘Destination’.
WordPress Migration — Install WordPress Migrator Plugin
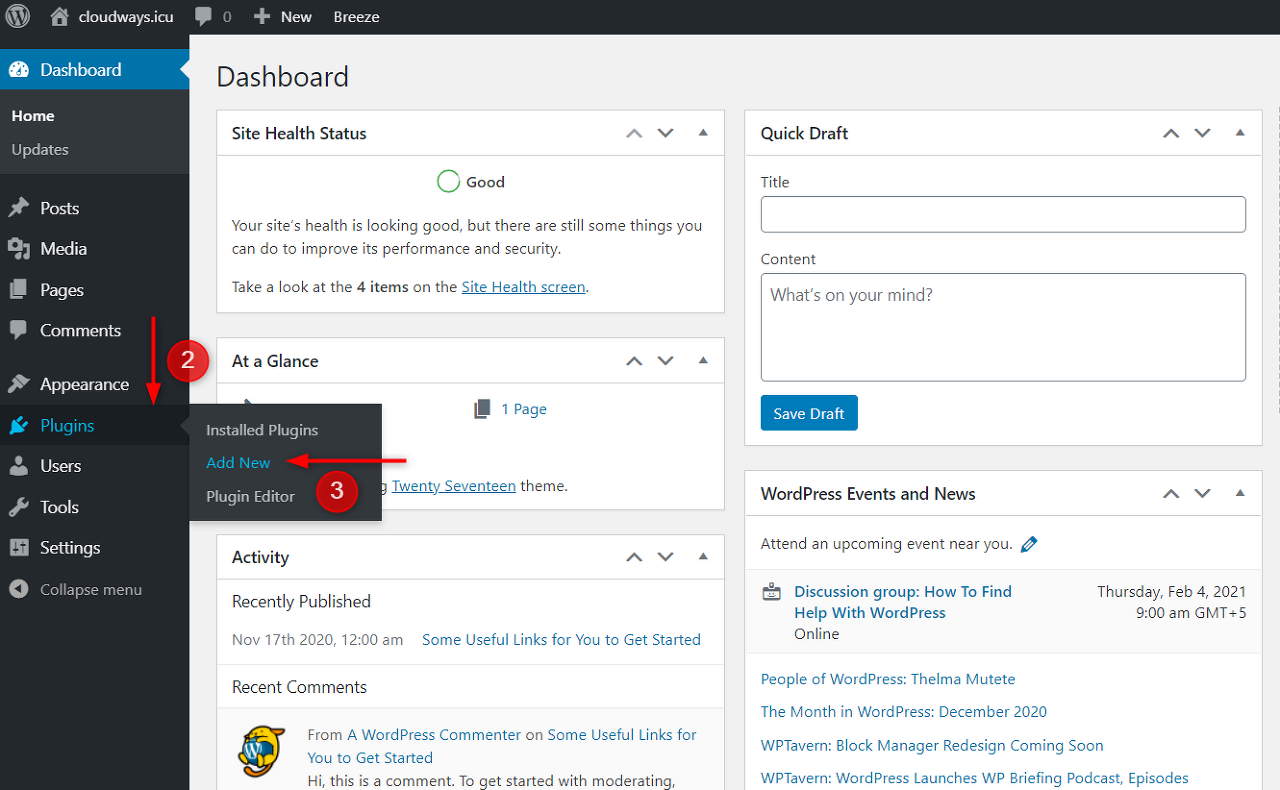
Next, you need to install Cloudways WordPress Migrator Plugin on your existing WordPress application hosted on another provider. Here’s how you can do it.
- Visit your WordPress admin panel and Log In with your credentials.

2. Select Plugins.
3. Click Add New.
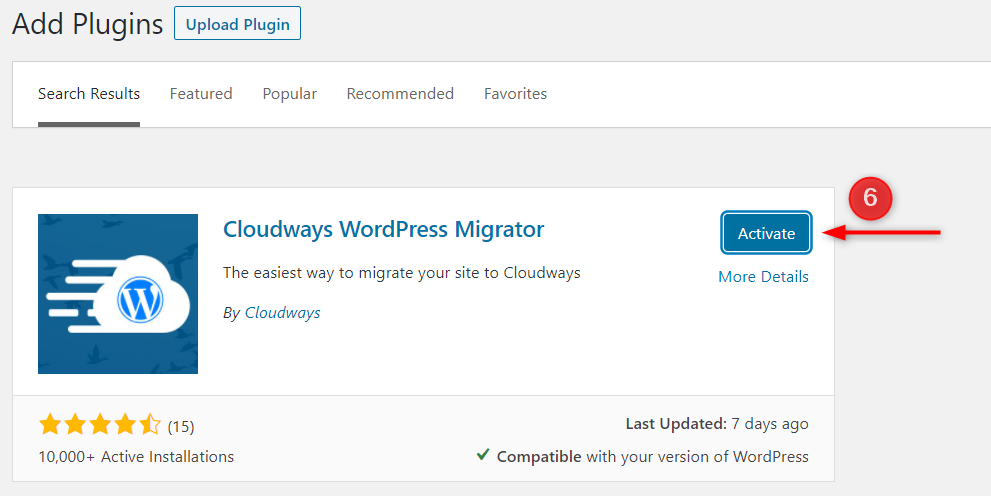
4. Next, search for Cloudways WordPress Migrator Plugin.
5. Click Install Now.

6. Once the plugin is installed, click Activate.
WordPress Migration — Initiate Migration
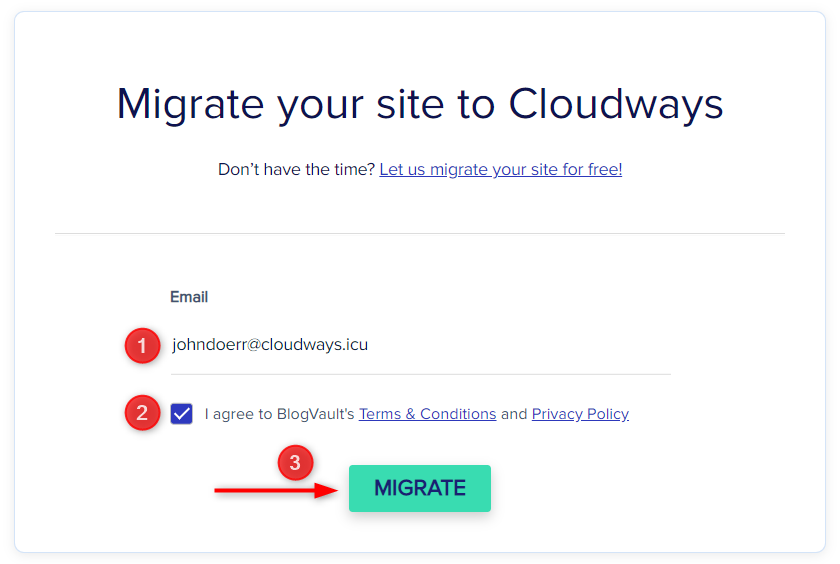
Next, you will initiate the migration process after entering the following details:
- Enter your email address.
- Next, agree to the terms & conditions and privacy policy.
- Click Migrate.
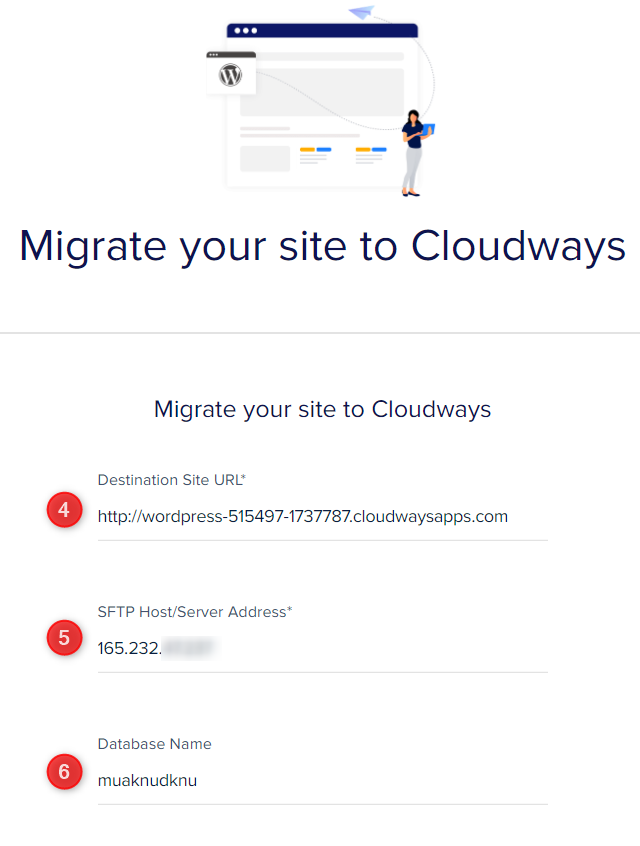
Here, you need to enter the following information in the form to initiate the migration:
4. Enter your Destination Site URL. This is the URL of your application that you launched on Cloudways in the first step.
5. Enter your SFTP Host/Server Address. This is your Cloudways server’s IP address.
6. Enter your Database Name.
How to Find this Information?
To find your application information, follow these steps:
- From the top menu bar, open Servers.
- Then, choose the server where your desired application is deployed.
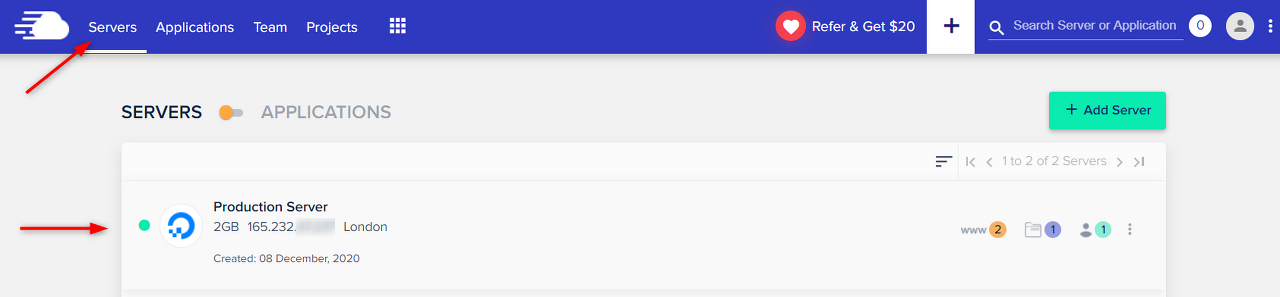
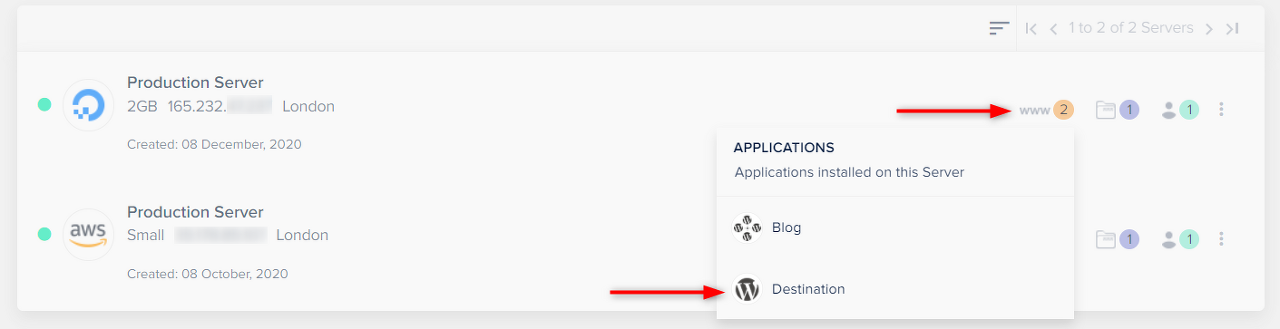
3. Next, click www.
4. Choose your application’s name.
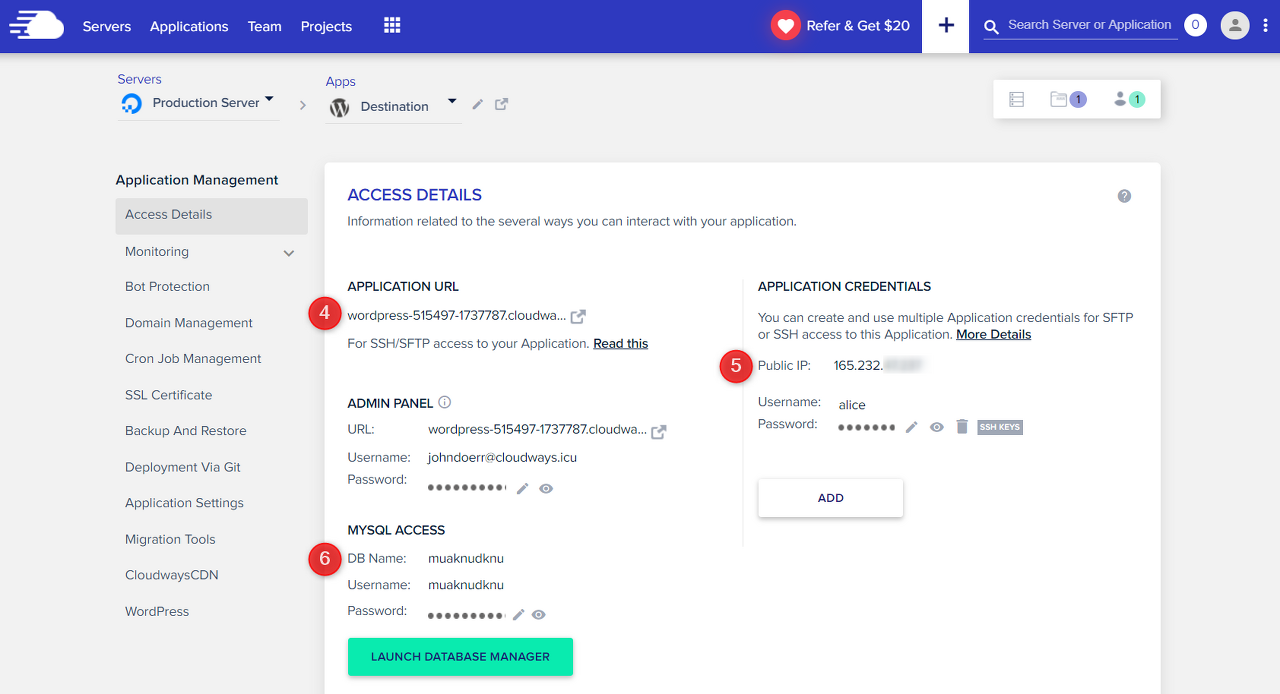
Here, you will find your (4) Destination Application URL, (5) SFTP Host/Server Address (IP address), and (6) Database Name.
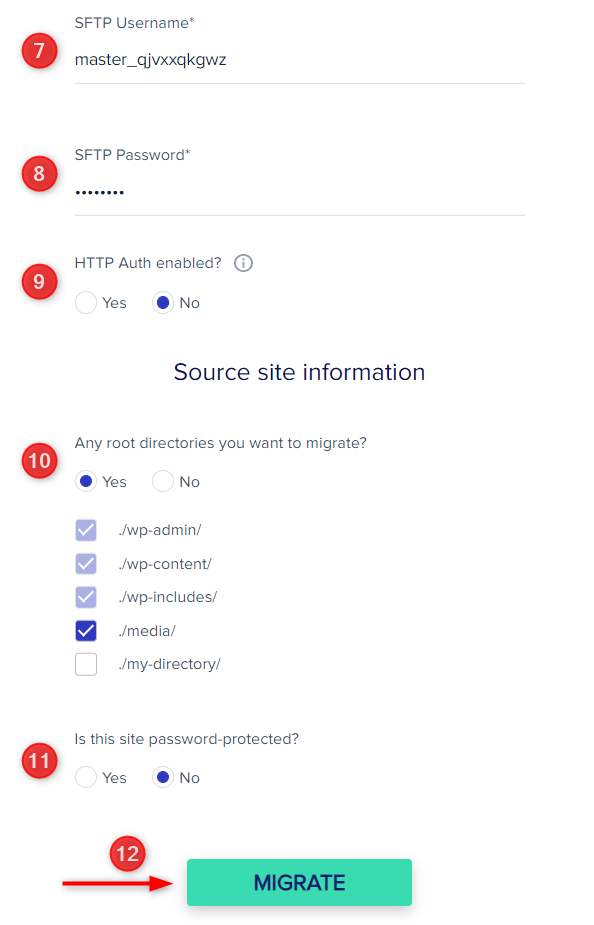
7. Next, enter your SFTP Username. Your SFTP username is your Master username. 8. Enter your SFTP Password. This is your master user’s password.
9. Under “HTTP Auth enabled?”, select No as we have not set up any password to visit the Cloudways-hosted application. If your Cloudways-hosted site is restricted and password-protected, select Yes and enter the username and password.
10. Under “Any root directories you want to migrate?”, select Yes if you also want to migrate your custom non-WordPress directories present in the public_html directory. Else, select No if you don’t wish to migrate your custom directories.
11. Under “Is this site protected?”, select No if your current WordPress website on another host is not restricted and is not password-protected. If it is password-protected, then select Yes and enter the username and password.
12. Finally, click Migrate.
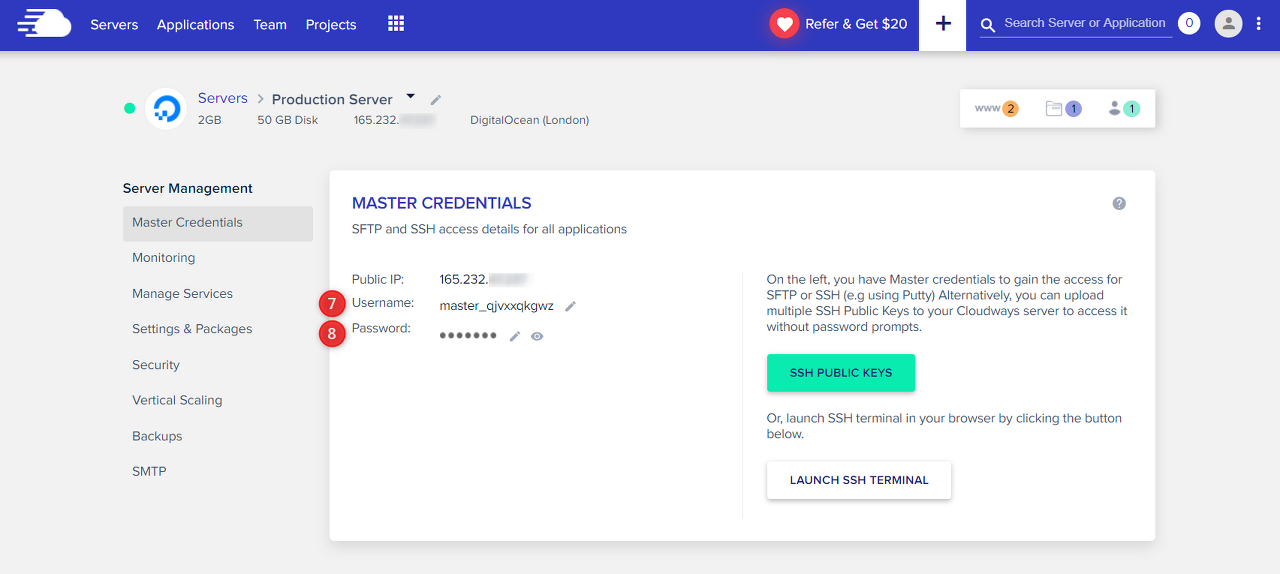
How to Find SFTP Related Information?
To find SFTP username and password, follow these steps:
- From the top menu bar, open Servers.
- Then, choose and click the server where your desired application is deployed.

Here, you will find your (7) SFTP Username and (8) SFTP Password.
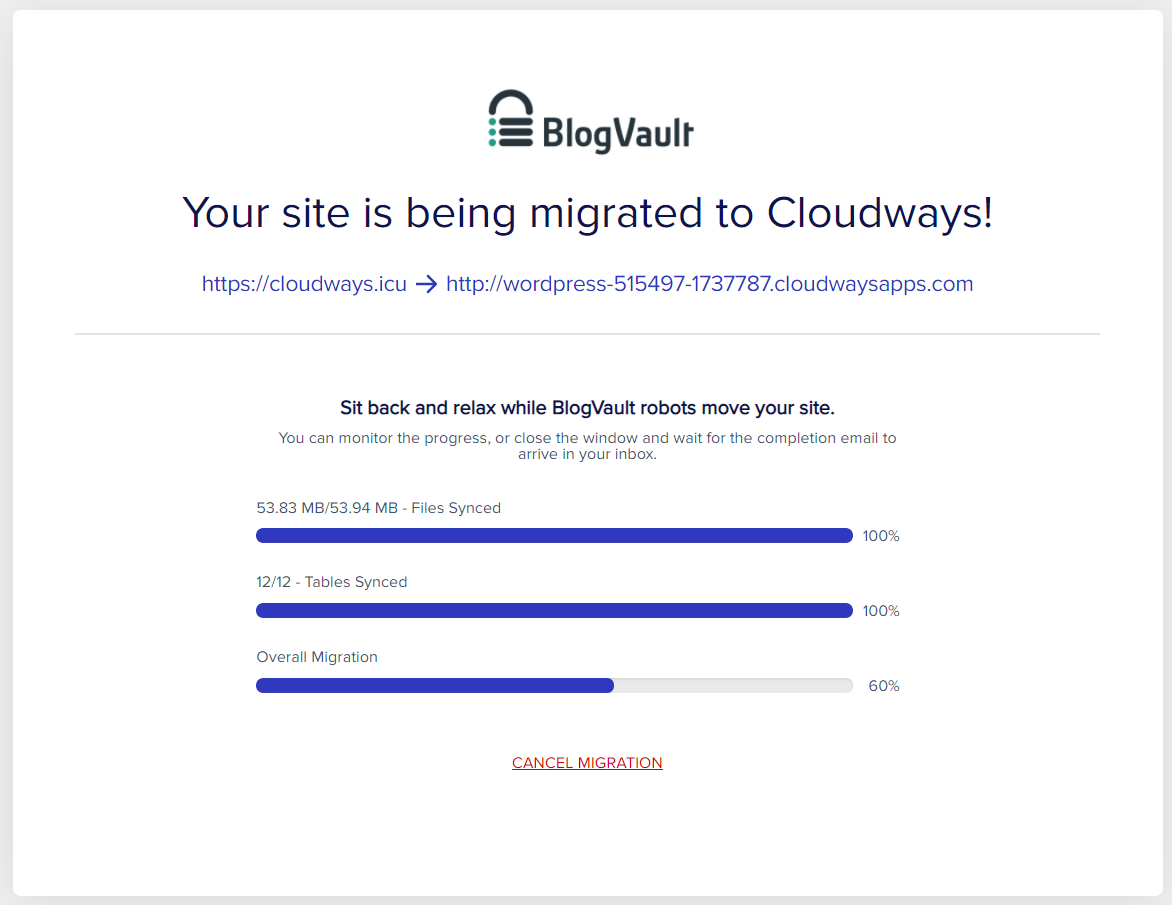
That’s it! The migration has successfully begun. The migration time is based upon the size of the data being migrated.
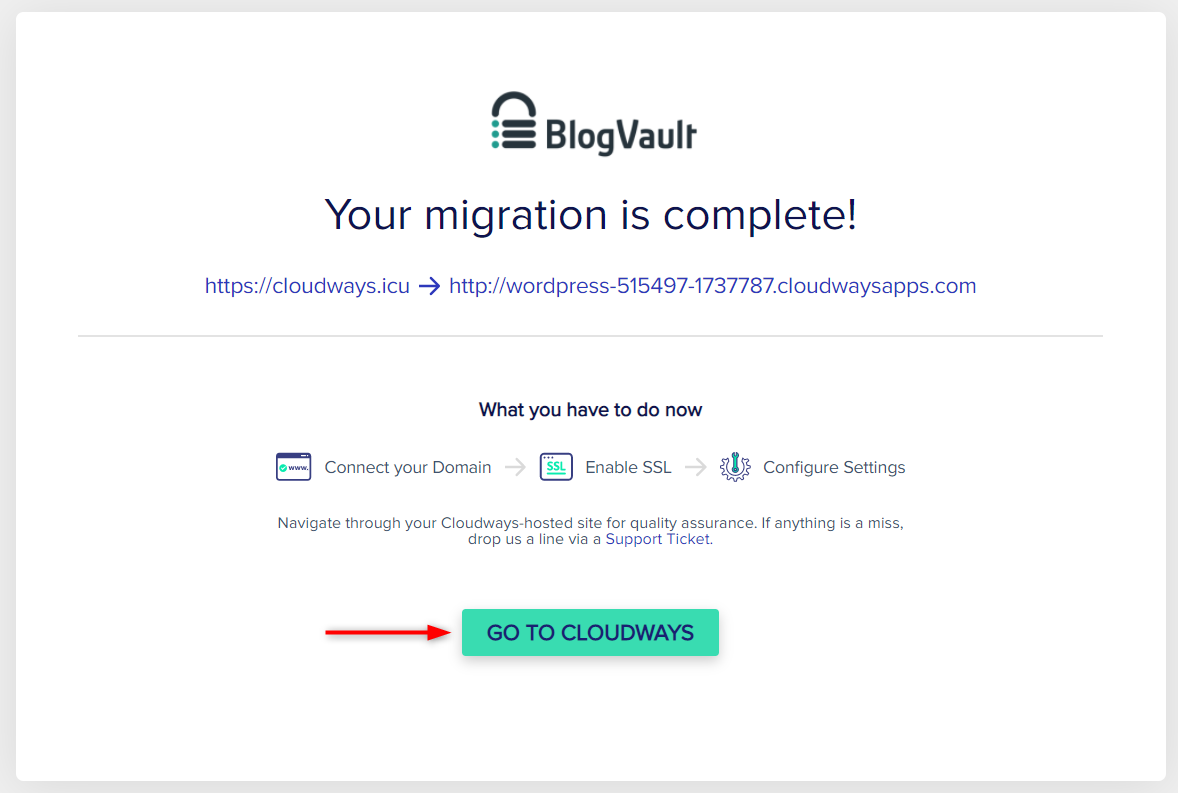
WordPress Migration — Test Your Migrated Site
Once the migration is completed, you can test your site by clicking Go to Cloudways or by simply visiting your Cloudways-hosted application. Please note that your Cloudways-hosted application is going to have new WP-admin credentials available on the Cloudways Platform. More information here.
Tips
- Having a problem viewing your site? Purge the Varnish cache from the Cloudways Platform.
- If you do not wish to migrate the website yourself, you can also request Managed Application Migration, where our cloud experts do the heavy lifting and move your site to Cloudways. You get one free managed migration with your Cloudways account.
Now, you can follow this checklist to take your website online from Cloudways.
That’s it! We hope this tutorial was helpful. If you need any help, then feel free to search your query on Cloudways Support Center or contact us via chat (Need a Hand > Send us a Message). Alternatively, you can also create a support ticket.
이 포스팅은 쿠팡 파트너스 활동의 일환으로, 이에 따른 일정액의 수수료를 제공받고 있습니다. 1 5